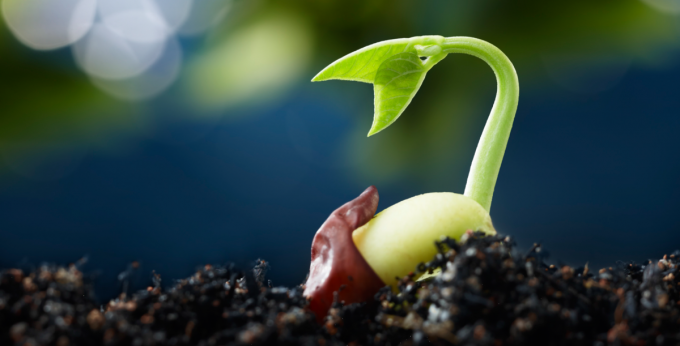
To me, seeds are magical: a little moisture, a little warmth… they crack open and the fun begins!
If starting veggie seeds indoors this season appeals to your growing sense of spring fever, you’ve come to the right place. I’m going to walk you through some of the basics of Seed Starting 101 so you can avoid a lot of the common mistakes, and hopefully have fun along the way!
Don’t get caught short!
The interest in home gardening has skyrocketed in the time of Covid. As a result, seed shortages were common last gardening season.

Tagawa’s has planned ahead and has seed racks brimming with every type of home-grown veggie seed you might want to try, (and lots of flower seeds, too!)
The seed packets are a wealth of information. They’ll tell you which veggies are suited to starting indoors and which plants are better off sown directly in the garden.


Also, pay attention to how long it takes for the different types of plants to mature. The growing season in and around metro Denver is roughly early- to mid-May when we have our average last frost until late September/early October when we have our average first frost. Trust the information on the package and don’t start your seeds indoors too soon! It’s one of the most common mistakes you can make! Holding back seedlings that are ready to get growing can often backfire and turn a good young plant into a weak one.
It’s easy to lose yourself with the colorful pictures and beautiful drawings on the seed packages, but as much as we’d love to sell you all the seeds you want, a little homework is in order first.
First thing, think light
A lot of new gardeners have a romantic notion of beautiful seedlings thriving on a sunny windowsill, but that’s not necessarily how it works.
Once your vegetable seedlings sprout, they have to have light.. lots of light… at least 14 hours of direct sun every day. Most windowsills can’t begin to offer that much good light in early spring. Without it, seedlings will be weak and leggy and unlikely to thrive.
Artificial light is the answer. Tagawa’s carries a wide variety of bulbs and fixtures that can make all the difference between healthy, robust seedlings and plants that just don’t make it.

Depending on how many seedlings you want, providing artificial light can be as simple as a special bulb in an adjustable lamp you already have… or as elaborate as a four-foot-long specialty fixture that will light up several full-sized trays of tiny plants.
The distance from the lights to the plants can vary depending on the type of fixture you choose. The folks at Dick’s Corner can help explain what plant-to-light distance is best for the type of lighting approach that works for you.
Pots and containers
If you’re starting a lot of seedlings, small “cell packs” or slightly larger two-inch plastic pots might be just right for the job at hand. Biodegradable peat pots or peat pellets (that expand once watered) are options, too. In our Colorado soil, biodegradable pots do best if they’re scored or gently opened up just a bit before planting outdoors to help the roots escape.
Tagawa’s also has something new this season: Docupots.

These two-inch-square white pots are made of recycled office paper compressed so hard that they almost feel like plastic. When the pots are planted in the garden and thoroughly watered, they’re designed to dissolve in just a few days, allowing the roots to grow.
Once you’ve chosen your containers, fill them with a thoroughly-moistened (but not soggy) seed starting mix. This sterile mix will help prevent disease and offer a light and welcoming environment for the seeds.
The get the strongest plants, it’s a good idea to put two or three seeds in each container, knowing you’ll be thinning them out down the road. Once the seeds are set into the soil, cover them lightly with more seed starting mix. The seed packages will tell you specifically how deeply to plant the seeds. If the seeds are too deep, they may not sprout. Firm the seeds gently but firmly into place so they’re in good contact with the moist soil. Since the soil is well-moistened, you shouldn’t need to water the pots right away. If the soil begins to dry before, just as the seeds are sprouting, mist it well with a spray bottle but avoid overhead watering which could dislodge the seeds.
Humidity domes and heat mats
Humidity domes are clear plastic lids that help create a greenhouse for your seedlings. You can also use clear food wrap to make a tent to serve the same purpose. Heat mats are special waterproof mats that create helpful bottom heat that encourages the seeds to sprout.
But there is a catch to babying these tiny plants too much: you want to avoid the most common disease problem that can easily wipe out young seedlings in just a matter of a few hours.
“Damping off”
Damping off is a fungal disease that attacks young seedlings right at the soil line if their environment is kept too warm and too humid for too long. And it’s nasty!
When the first seedlings begin to emerge, turn off the bottom heat and begin to open the humidity dome or plastic wrap to allow in more fresh air. Once most of the seedlings are showing, remove the dome or wrap altogether and make sure the area where the tiny plants are growing has plenty of good air circulation. A small fan sending a gentle breeze over the plants 24/7 can prevent damping off and encourage the young stems to grow strong and sturdy in the process.
The seedlings should be kept moist, but never soggy! As the small containers dry out, the plants can be watered very gently from overhead. Many seed starters prefer to put water into the plant tray and let the seedlings soak up the moisture that way. Just make sure they’re never left sitting in any excess standing water.
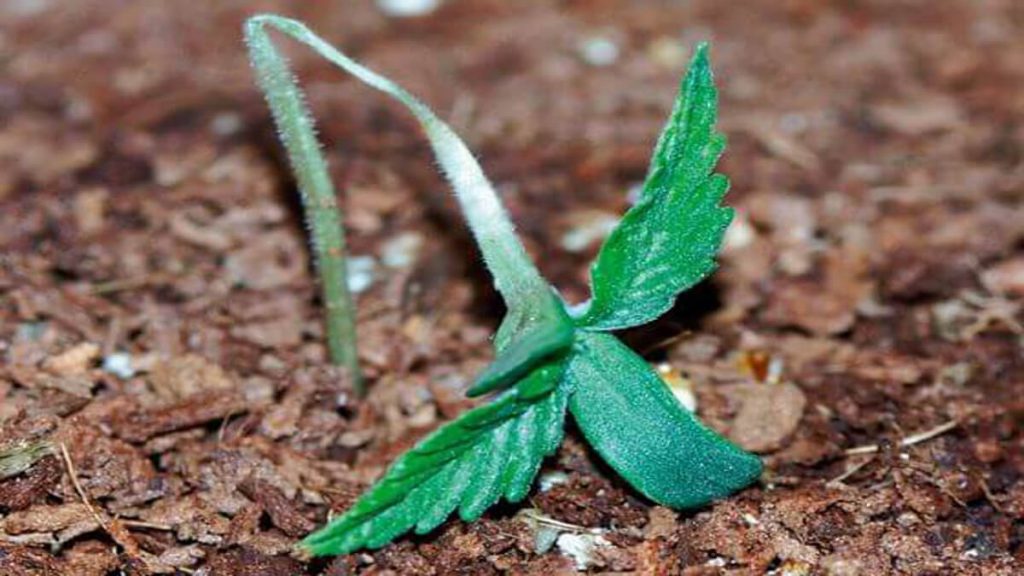
Look for the “true leaves”
The first leaves that appear on seedlings are “seed leaves,” the leaves that wrap the seed’s embryo inside the seed casing. Seed leaves look nothing like the “true leaves” that follow. Those clearly appear just the way the leaves on that type of plant should look, as seen on this cucumber seedling.

Once a plant’s true leaves have appeared, thin each small pot to the single strongest seedling by cutting away, never pulling, the weakest young plant. Be tough, and don’t skip the thinning! If you try to grow two or three seedlings in one clump, your plants, and your harvest will suffer.
Time to start feeding
Once your seedlings have their second set of true leaves, begin feeding with a liquid fertilizer at half strength once a week. Again, never let the young plants dry out. They should be kept well-moistened, but not soggy.
If your seedlings grow vigorously, they may need to be “potted up” into slightly larger pots with regular potting soil before they go out into the garden. They’ll still need to be kept under good strong light for 16 hours a day until steady planting weather arrives
When that time comes, remember to “harden them off,” by acclimating them gently to their new home outdoors. Set the young plants out in a very sheltered location for a few days, then gradually increase their exposure to sun and wind for a few more days. Proper hardening off will dramatically reduce transplant shock and give you much stronger plants to start the season.